Monday, February 27, 2017

CARNIVAL 2017!!!

We are taking a short break from all the serious fashion happening all over the globe at this moment to give a nod to our Caribbean friends celebrating Carnival or Mardi Gras. This is always a fun little project that takes me back to the four years I spent in Trinidad. So, put on some music from "down in de islands," gather your dolls, some feathers, beads, bikinis or bodysuits and lets have some fun.

This is a fairly naked look, so even though for this year's edition, I'm using a full bodysuit that completely covers the torso, the doll appears to be nude with embellishments tacked onto the skin. To get the most authentic look there should be some sort of head gear and some sort of footwear stuffed with feathers. I decided I wanted to use a sheer bodysuit as my palette. (For my post on bodysuits, click HERE.) Since that particular pattern was created for use with a stretch material, the fabric you choose should be stretch. But if you use a fine tulle, and lay your pattern on the bias (diagonally), it will be enough to get the doll in and out of the sewn outfit.
 
For this costume, I chose black tulle because the doll's skin tone is quite dark, however, if you use a light toned doll, choose a color that matches her skin tone.

Using the pattern for the maillot bathing suit (for that tutorial click HERE), I've cut a single layer of tulle which I hand sewed together at the side seams. I wanted to make something with "jewels."
Auto-adhesive rhinestones is an easy bet. You can place them strategically over the body. Another option is to sew tiny seed beads. Of course, that is a bit more time intensive. What you should NOT do is to use glitter on tulle. In the above photo, I have used a combination of stick-on jewels and hand sewn seed beads. To be honest, I began by trying to glue large flake glitter. By the time I could remove the bodysuit to remove the protective plastic on the doll's body, most of the glitter fell to the ground. I added beads to cover the residue of glue. But the more I worked, the more glitter fell off.

Another effective way to do this is to use organdy pre-embellished with rhinestones. This material has a finer weave so it doesn't stretch as well as tulle. If you are still tempted, make sure you allow enough side seams allowance and don't expect it to fit as snugly on the body as bias cut tulle or jersey. Even with this limitation, I was still intrigued because this gave me a head start on my glamorous project. Using self adhesive rhinestones, I simply tacked on extra the jewels.


Nichelle's crown is a Barbie tiara that I have simply glued on rhinestones and added a tiny tuff of black feathers. I've attached white feathers to the back of the waist using a method described towards the end of this post. You can always sew the feathers directly to the back of your costume, but I will probably use this bodysuit for something else later on.


Bird Land
Back to my basic black tulle bodysuit. Again, feathers are an important part of a Carnival costume. For a 12 inch fashion doll, you don't need very many for the body of the costume. A small package of loose feathers is more than enough!
Step by step...here's how I made her feather bodysuit. 1) Starting with a sheer bodysuit, sew in place the first feather (pointing downwards). 2) I added the second feather (pointing upwards) by tucking the stem behind the first one so you don't see it. 3) A third feather is placed on the other side of the first one (pointing down). 4) And a fourth (pointing upwards) is sewn in place slightly off center. 5) I placed a tiny dab of glue over the stem of the last feather. 6) Place a last feather over to conceal everything. 7) I placed two feathers (pointing downwards) at the small of the doll's back. I then added a couple rhinestones over the stem. 8) And I final rhinestone in the front. The sides of this bodysuit remains nude and allows the doll to get in and out if it.
I used one of the masks we made last Halloween. (Click HERE for that tutorial.) I've embellished her Barbie shoes with bits of ripped organdy and added a tuff of feathers to each shoe.


EZ Does It!
No time to do this? Don't feel like sewing? No problem! Take an existing bikini or swimsuit and simply dress it up.

The headgear is as simple as adding auto-adhesive rhinestones to a Barbie tiara. No tiara? All you need is a little bit of a pipe cleaner and a shiny doily. I cut off a few medallions and glue them together. You can tie this to the pipe cleaner using a thin craft wire or simply glue it. Add a rhinestone or two on the front and dolly is transformed into Carnival Queen!

Shake a Tail Feather
Most craft stores around the globe sell marabou feather boas which is all you need.
1. Fold them in half, then fold in half again.
2. Tie together in the middle.
3. Using a twist tie or a thin wire cut to hug the doll's waist from side to side, slip this through where you tied the feathers together.
4. Place around the doll's waist and squeeze until it fits. You can also use ribbon and work this into the overall design of your costume.
5. Note, to pull off this look, she's wearing a headpiece, lots of sparkly beads or rhinestones (right out of your own jewelry box) around her neck and, in this case, boots stuffed with a few feathers tucked in!

Wishing all our friends in the southern hemisphere a very happy, joyous and safe Carnival!!!!


Follow us on Twitter: twitter.com/FashDollStylist
Like us on Facebook: facebook.com/FashDollStylist
We're also on Pinterest: pinterest.com/FashDollStylist
Come join us on Instragram and show off your stuff: instagram.com/fashiondollstylist

Tuesday, February 21, 2017

Train of thought....


The idea for this post came out of a suggestion of reader, Karen who admired a stunning black gown by Stephane Rollin in my last post on Paris Couture. Not only was it a great idea, but it is one that we will be seeing lots of at the Academy Awards' red carpet just a few days away.

The train dates back to the Middle Ages when the aristocracy used this trail of fabric to express their social status. The longer the train, the more important the bride's place was in society. It was eventually adapted into the dress of Europe's high court for other types of affairs. Today, other than wedding dresses, trains are seen on gown worn to black tie events like opera premiers or prestigious red carpet spectacles like the Oscars.
(From upper left to right): Sheer polyester, sheer silk georgette, 2-way rayon jersey, pink silk satin (Lower left to right): medium weight polyester satin, light weight silk satin, sheer cotton muslin, silk chiffon.
Before we get started, you have some design decisions to make. Does your doll want a big, cotillion gown with lots of fullness all around? Or does she want something slinky with a dress that drips off her vinyl hips into a pool of jersey? Perhaps all you want is trail of chiffon cascading from her delicate shoulders. How long and how wide do you want dolly's train and what shape does it take at the end: round, oval or in a point? Your choice of fabric will also impact the look of your gown. Depending on the weight and sometimes the fiber content, the dress will either be light and "fluffy" or statuesque with folds falling like Grecian columns. If possible, take the doll with you to the fabric store and hold a corner of the fabric to the waist of the doll to get an idea as to what you can expect.


Circle of Life
I begin with a circle skirt with an 8 inch (20cm) train. (You can add a corset or some other top of your choice for an endless combination of looks.) A circle skirt with an 8 inch train is a big pattern, so for this project, I am using tissue paper (recycled from the packaging of many things I buy on eBay). This will also help me to visualize the skirt before I start with fabric!
1. I begin with the draft of the circle skirt. It is a full skirt with a single seam, planned for the left side of the doll. (For this skirt, I didn't want a seam down the middle of the train.) You should also draw a line indicating the center front and the center back of the skirt.
2. Fold the skirt in half and hold next to the back waist of the doll.
3. Here is where you should decide on the length of the train. Tape another sheet of paper under the skirt.
4. Trace the curve of the circle onto another sheet of paper.
5. Place that curve where you feel the train should end. You can decide to make it longer or shorter at this point.
6. Once you decide on the length, measure from the end of the skirt to the end of your planned train. Tape down. Extend the center line of the skirt to the end of where you want the train to end.
7. From the circle to the end of where you want the train, draw a new curve. You only need to do half.
8. When you are happy with the shape of the train, you will eventually trace this half onto the other side.
9. Cut the pattern out. Be sure to cut along the side seam.

10. Put the tissue paper pattern back on the doll. (Tape to her.) Then decide if you are happy with the distribution of fullness and shape of the skirt. Here, I decided I wanted the skirt to hang lower in the front and further out at the sides.
11 Tape on more paper to one side only. Mark a new hem.

12. Try it back on the doll. Make adjustments if necessary. In my case, I was happy with the skirt.
13. When you are happy with the look, remove the pattern from the doll. Trace the adjustments you made on the one side to the other. It's time to cut out the fabric.

14. To line or not to line. Linings add bulk and result in fewer folds in the garment. If big and fluffy is what you want, there's no problem. But if you want something slinky or sheer (lace, for example), it's better to forget the lining and hand roll the edges and hemline. You also have the option of putting in free hanging lining (joined together only by the waist and side seam) and hem each layer. OR....hem the top layer and add ruffled lace to the underskirt. One more point---even though the gown is big, the lining can take the form of a smaller sheath dress underneath which allows the outside to fall as it may without the bulk.
13. In any case, I've suspended this skirt from a small waistband, closed by a small hook & eye. Again, beware of adding bulk. I use ribbon and sometimes the selvage edge from the fabric which I stitch on top of the skirt.
Seamless train
Train Station

With this project, I want to show you how to create a train for an existing pattern. For best results choose one that has some flare at the sides. I had a pattern (strapless, flared sheath with a dart at the bust) for a red carpet dress I made awhile back. For this project I modified it to create the Stephane Rollin Haute Couture dress. Note: I'll show how I arrived at my pattern at the very end. But for the moment I want you to understand how to create a train for any style of dress.
1. Begin by lining up the front and back pattern pieces together along the side seams from the waist down. Place them over another piece of paper so we can create a new pattern.
2. On the center back line, draw a line from the hem to the length of the train you want. Trace the existing hemline onto the tissue paper. Sketch in the shape of the train from the narrow point at the side to the very end of the train.
3. Cut the extension you've just created and tape onto the hem of your pattern.
Again, try this tissue paper pattern on the doll and make any adjustments you feel necessary. Here, I was pretty happy with the look of this dress.

 For this dress, I selected a 2-way stretch rayon jersey. It is lightweight but hangs extremely well, falling into sculptural folds from the doll's hips. For that reason I didn't want to fully line this dress. So I decided to do a waist-length foundation which would add structure at the top but allow the dress to hang free. I chose a lightweight cotton interfacing. I traced the dress pattern to just below the waist. This "foundation" is attached to the dress along the top edge of the dress. A hook and eye is used to close the dress at the back. The "lily" was cut from a small bit of sheer cotton with a few tucks.

What happens if you want to use a dress with princess line construction?
1. Here is a classic princess line dress.
2. Put the front aside and line up the other pieces along the side seam lines. So, back to side back, side back to front back.
3. Place on another piece of paper. Extend the lines where the patterns touch. Trace off the hemline. Extend the center back line to the length of your train.
4. Again, starting from point zero on the side front to the very end of the train at the center back hem, sketch out the shape.
5. Cut out those additions and tape to the original pattern.
6. Here is what my princess line pattern with a train resembles.

A few simple ideas...
If you feel this is completely over your head, there are a few simpler ideas at hand.
This is a simple empire waist dress that I've simply added a small length of chiffon to the bustline. It is stitched over the bodice and allowed to trail down the back.
In this instance, I took an existing dress and added a train. This is simply a rectangle that I have hemmed and gathered on one end. I stitched it to one side of the dress but left it free on the opposite side.
It is held in place with a hook and eye.


FYI...
For those of you curious about the pattern I used for the Stephane Rollin gown. I'll do this quickly (since this post is already very long and this duplicates information already on the blog). I'm using a short version of the dress which I then modify over the bust line. If you decide to do this dress, don't forget to lengthen it to floor length and don't forget to add seam allowance.
1) This dress began using basic slopers. I moved the waistline dart of the bodice sloper to the side. I mark the point where the new dart will be and cut along this horizontal line to the apex of the dart. 2) Fold the waist dart and the new side dart appears. 3)The new pattern. 4) On the front skirt sloper, draw a vertical line straight down to the hem and cut. 5) Close the dart and the hem widens. 6) The new flared skirt pattern.
1) Along the center front, line up the bodice and the skirt pattern at the front waistline point on the CF. 2) Make a curve where the side of the top meets the skirt. 3) Redraw the front pattern. Trace to the other side to make a full front pattern. Draw the new neckline. In this case, it's asymmetrical. 4) Cut away to create the new pattern. Here, I've put a dotted line to indicate the cutting line for my foundation garment.
The back is composed in the same manner as the front. For the backbodice, I've moved the dart to the armhole (basically to move it out of the way). And for the skirt, closing the dart, shifts volume to the hem.
Again, back bodice and back skirt are lined up at the CF waist point. A new pattern is created after a drawing a curve where the top and bottom meet.
1)We need to redraw the neckline. But to do this, we need to line up the front to the back. Make sure that the sides line up (making any adjustment as needed). 2)Mark where the top of the front meets the back. Draw the new neckline on the dress back. 3) Make the new pattern. 4)Using the techniques described earlier, complete the pattern for the gown as well as for the foundation garment.


We have a lot of exciting things on the horizon. Fashion week is in full force. Next weekend, Hollywood is the focus when the Academy Awards will take place. Oh....and did someone say...CARNIVAL!!!???

All images and text property of FashionDollStylist 2017. Please do not reproduce without permission. Thank you.


Follow us on Twitter: twitter.com/FashDollStylist
Like us on Facebook: facebook.com/FashDollStylist
We're also on Pinterest: pinterest.com/FashDollStylist
Come join us on Instragram and show off your stuff: instagram.com/fashiondollstylist

Sunday, February 12, 2017

Doll's Eye View: Spring/Summer 17 Paris Couture

Just at a point when I had practically given up on couture, one of the best seasons in a long time rolled in. I'm not really sure what, in these political and economic difficult times, has prompted a change in the style, the taste and the choices of the participating couturiers. Is it a question of escapism...a desire to relive the glory days of couture when fashion was less about making headlines and more about making the woman feel beautiful. In any case, for me, this is a positive sign that Haute Couture may not be dead, after all. In a word, Spring Summer 2017 Haute Couture fashion week was...PRETTY!

Powered Up!
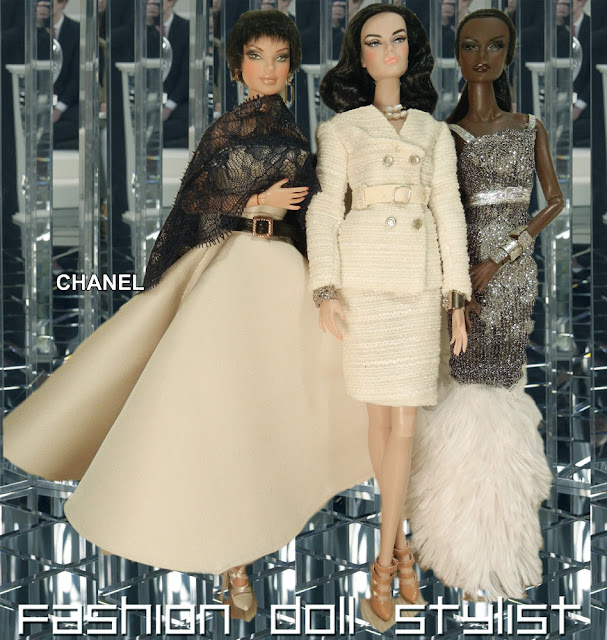
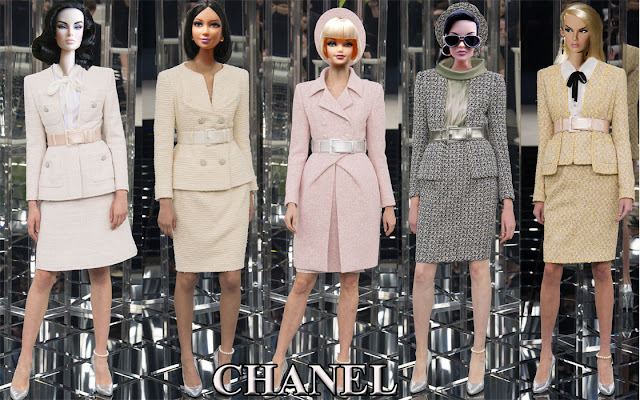
In my early days of attending Haute Couture shows, daywear was just as important as evening frocks. Lifestyles have changed. "Ladies" don't "lunch" anymore. And for most women who have the means to afford these made to order clothes, they'd rather put their money in formal gowns. But still...women in media, CEOs of Fortune 500, companies, and high ranking government officials will buy a suit that matches their stature. And that's why Chanel continues to produce the most popular suits in the world!

Artfully Speaking
Don't get me wrong. There is still a certain degree of creativity in Couture, these days. It's just kept in check with the realization that women want to wear clothes not fashion statements. At one point, Haute Couture was the atelier where ideas were born then later simplified into commercial ready-to-wear. Though the latter has taken over the headlines today, there is hint of playfulness as seen through color and fabric treatments. 
 
Prints Charming
The first thing that comes into view: spring is abloom in the way of floral prints and delicate embroidery applications. Princess silhouettes are fresh and elegant, with swirls of fabric cascaded down from fitted bodices and marked waistlines.
 
Tarte Aux Fruits
For spring, we expect to see delicate colors. What is really tantalizing is summer where the color story is drizzled with sparks of fruity tones like blueberry, tangerine, mango, raspberry and lemon! Again, silhouettes are easy, body skimming styles or light and frothy with miles of tulle.

On Her "A-Game"
A shift in silhouettes is evident. The narrow, body hugging dresses have given way lines that swing far from the body in exaggerated A-line dresses and full skirts. The look is light and romantic, rhythmic, reminiscent of the romantic fashions from the 1950's and 1960s.
Think "poodle skirts" without the poodle and cut in luxury fabrics. Look for circle skirts, petticoats and softly gathered skirts to twirl into the spotlight. Pictured here, I did Anna's dress in two parts: a fitted bodice worn over a full circle skirt. I purposely chose a stiff, thick fabric so the skirt would stand out without need of a petticoat. However, I did not add the trim (of the original skirt) because I felt its wideness was more modern and made enough of a dramatic statement on its own.

Powder Puff
Another flashback from the early 1960's....pastel tones and soft fabrics for a decisively feminine look.
The waist is marked with belts or nipped waistlines. Wrap dresses show a flash of leg. Color are easy on the eyes!
From time to time, we find a look that translates very well into that perfect Barbie dress. The dress is cut from a filmy fabric, smocked to hug the entire torso and ends in a burst of ruffles and gathers. (Note: Adriana's dress is made of nylon from an old nightgown!)
 
Summer Mist
Story here is the color palette. Soft, misty, in tones of mauve, powder blue, smoky taupe...like Easter bonbons with a tinge of grey. It's as if you are looking at pastels through a veil of fog at dawn. Trousers also have a place in formal wear. They fit the body gracefully with ease. Dresses have dramatic details....a cape cascading from the shoulders, cabbage roses floating over a sheer layer of silk, the tail of a jacket trailing to the floor.

Family Jewels
Old fashion glamor is back. Think Hollywood movie starts in the 1930's...gowns complete with trains, fishtails and feathers....sometimes all in the same garment. This is a category where sparkly, shiny fabrics prevail. Think silver lame, sequins, bejeweled embroidery cut in basic sheaths.

The version worn by Waris was made from silver lurex sprinkled with a layer of silver glitter. Since I did not have the time to make a second fishtail (and I wasn't sure I wanted to use feathers), I took a shortcut by using a "long haired" faux fur. For me, this is a red carpet look that deserved, as an accessory, the addition of a faux fur stole.
 
Organically Grown
All the shades of black. In this theme, shapes recall organic, vegetal elements that are put together for a sleek, modern look in formal wear. This is a more edgy look that relies on a mix of textures, unusual shapes and materials.

I was quite intrigued by this dress which appears to be made of thick cord.  You could say..couture for the 21st century. For Anna's dress, I made the fringe myself by cutting cord and stitching onto a strapless bodice and a separate one-piece skirt.
Sadly, I don't have the patience needed to knit or crochet. So, I took a shortcut. Brie's dress is made from stretch lace. The feather "fishtail" was created separately (from loose marabou feathers) then stitched on.  
 
A Moment with Mozart
Basic black with plenty of romance from a bygone era. There is a rhythm to these dresses, A sort of built-in movement that makes the dress almost dance around the ballroom floor on its own.  Black lace, sheers, tulle, velvet...again, silhouettes are lush, swirling about the body in a cloud of sheer fabric. There is a bit of sexiness here...but done in a such way that is shrouded in mystery. We see her legs.....or do we?

For Veronica's dress, I used panne velvet for the bodice of the dress, and a textured sheer fabric over a layer of black tulle for the godet wedges. The bodice fits her torso snuggly while the godets force the dress to stand away from the body almost in star formation. Pretty!!!
 

Follow us on Twitter: @FashDollStylist
Like us on Facebook: @FashDollStylist
We're also on Pinterest: @FashDollStylist
Come join us on Instagram and show off your stuff: @fashiondollstylist.blogspot.com