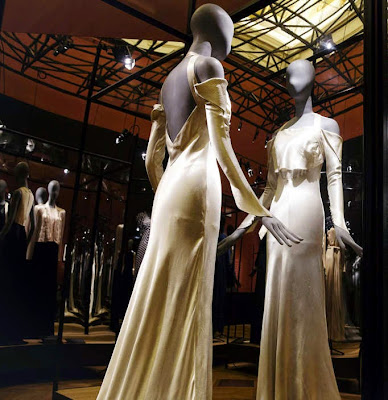
From the boudoir to the dance floor, what could be sexier? The "slip," once worn as an everyday undergarment, is a perennial favorite on global catwalks. Featured in the Louis Vuitton show a few seasons ago, it has re-emerged in time to step into the spotlight for Fall 2015.
 |
| Same technique, two different doll bodies. Estelle (left) wears hers under a lace trimmed satin kimono. |
There are two was I make this garment. Both are strictly doll-centric. That is to say, it is a super simple approach I use to build the garment directly on the doll.
 |
| Fall 2015 Slip dress |
This is not how the pattern for humans are made, though it yields the same look!
You can use any type or style of lace provided that it is the correct scale and weight for the doll. You can use hem tape (if that's all you can find), a very fine lace (even better) or...cut the trim off of a second hand garment (smart)! The skirt part can also be anything of your choosing, though you'll probably want a typical luxury fabric. The good thing is, you'll only need a scrap of it!
1. Wrap the lace trim around the doll, allowing for an extra 1/4-inch margin at both ends. If your trim has scalloped edges, you can play with it so that it falls above the bust in a sweetheart neckline.
2. Pin at the back.
3. Fold the left side under and pin. Eventually you will stitch each edge to itself. Tape to the doll's back to hold it in place while you are working.
4. Under each bust, pinch the fabric to create a tiny dart.
5. The dart should fold back towards the side of the doll.
6. This should NOT fit tightly. You should be able to slide the tip of your finger underneath. Hand stitch each dart.
7. Now let's do the skirt. Cut a square of fabric and wrap around the doll's hips to form a tube with the opening at the back.
8. Pinch the fabric at each side of the doll (where a side seam would usually fall) to form a small dart. Hand stitch in place.
9. Turn the doll over and fold the left edge over the right down the center back and pin in place. Be sure the center back seam of the skirt matches up with the center back of the top.
10. Now carefully slide this tube underneath the lace top and pin in place.
11. Make any necessary adjustments for fit and hand stitch using thread the same color as the lace.
12. For the back seam, use a pastel marking pencil and mark where the two edges (which make up the back seam) meet.
13. Turn inside out. Pin then stitch up to about mid-hip. (This is so the doll can get in and out of the dress.)
14. Now let's add a layer of lace at the hemline.
15. Pin in place, then stitch. You can stop there if you want the fabric to peak out from under the lace.
16. But I like the doll's leg to show through. So turn the dress inside out and carefully trim the fabric to within 1/8-inch (3mm) away from the stitch line of the lace.
17. Finish the dress by turning under and stitching down both edges of the lace top. Add hook and eyes for closures at the back. Add straps. Narrow ribbon (1/8") is perfect!
This is a slightly more advanced version of this dress which has a bra top. The way the lace is attached to the dress is reminiscent to the way vintage lingerie was made. If you have a problem with fraying, a little swipe of an anti-fray product can be used to the edges after you have finished the dress.
1. I use tape to make the initial pattern. Tape over the doll's bust. Draw a line around and beneath the bust. Then draw a vertical line (red) from the apex straight down to the line you drew under the bust. This will be used to create a dart.
2. Very carefully remove the tape and cut along that dart line so that the shape is flat. Put it on paper.
3. Draw in that dart. You now have the pattern for the bra top. We will not be adding seam allowance to this. Use this pattern to cut out two bra cups.
4. Now take your lace and trim it down to about 1/4-inch (6 mm).
5. Pin, then hand stitch around the edges (but not the bottom) of each bra cup.
6. As you did in the first version of this dress, cut a square of fabric that fits around the doll's hips plus about 1/4-inch (6mm) to both side edges for seam allowance. Add about 1/2" (1cm) lace to the top and whatever you'd like at the bottom. Stitch in place. Be sure to use the same color thread as your lace so that it remains invisible!
7. Turn over and trim to within 1/8" (3mm) from your stitching line. The back side of your top and the skirt part will look like this.
8. Tape the bra cups to the doll so that they won't move as you're working.
9. Take the bottom part of the dress and lay over the doll so that the lace falls about 1/8" (3mm) over the bottom of the bra.
10. Pin in place.
11. Turn the doll over and fold the left side over the right down the center back. Pin in place.
12. Again, pinch the fabric in on either side of the doll to create a small dart (for shape). Pin. Adjust. Sew. You can really stop right there.
13. Or, in my case, I didn't like how the lace seemed uneven in the front, so I cut a medallion from my lace and stitched it onto the dress, center front and added a tiny bead. Remove the dress from the doll and stitch everything together. Add straps.
Up next: The girls have landed in Paris where they have hit the ground running!!! First stop: They're going to give you a grand tour of the Jean Paul Gaultier Exhibition now on through August 3, 2015 at the Grand Palais!
Follow us on Twitter: @FashDollStylist
We're also on Pinterest: www.pinterest.com/FashDollStylist
We're now on Facebook as well!
www.facebook.com/FashDollStylist


