I like to group my tutorials by theme, as you know by now. But throughout the year, I get little snippets of ideas that, by themselves, don't warrant an entire post. Some are super simple like my fingerless gloves. Others are ideas I've been playing around with for awhile. Some of these you might have seen before as accessories in my fashion report pix.
Baring Arms
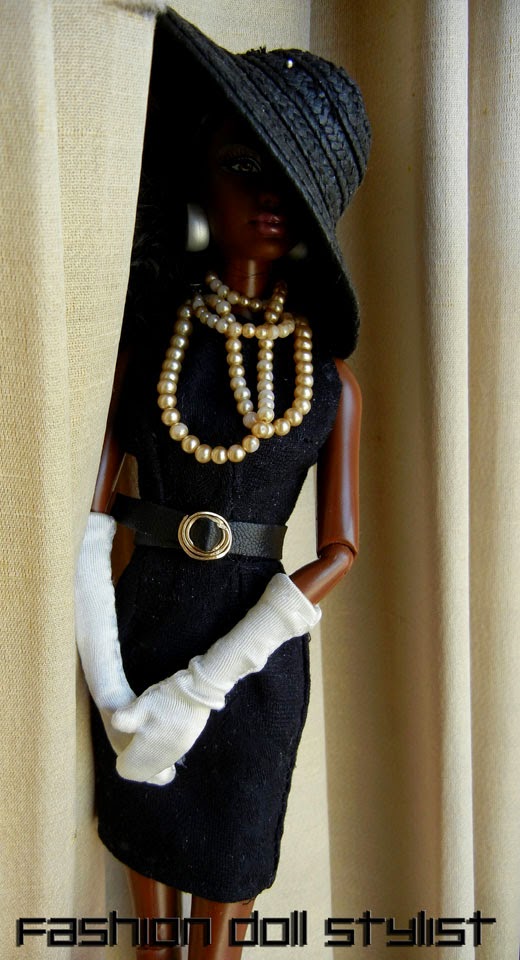
I love opera length gloves when it comes to accessories. I use simple tubes of fabric which I make directly on the doll. As a rule, they have no fingers because the traditional Barbie gloves are really mittens and no one wears mittens to a formal ball. Making these are super simple and you can use anything you want: lace, cotton, silk, nylon stocking.... But if you want them to be form-fitted, you'll need a stretch fabric. Rayon/lycra stretch fabric is perfect!!
For the gloves pictured here, I used lace hem tape. Wide hem tape is perfect because you only need to cut two, but if, somehow, you don't have access to this size, then the regular 5/8" (2cm) tape is okay too. You'll just need to (1) stitch two pieces of tape together first. (2) Measure the length of the doll's arm plus enough to fold over at the top and bottom. (3) Wrap the lace, lengthwise, around the doll's arm then lay the front edge over the back and stitch in place.
Here, to the same lace glove, I've embellished it with beads at the top.
Having problems getting the doll's fingers from getting caught in the lace. Simple. Put tape around her hands before feeding them through the gloves!
Some of you might still insist on gloves which cover the hands. So just for you, I made the classic Barbie glove.
(1) Trace around the doll's hand. (2) Trace along both sides of her arm for the length you want to make. This is indicated by the red line. (3) Add 1/8-inch (2mm) to the top of the fingers as well as the thumb (blue line). Then add 1/8-inch (2mm) seam allowance. (4) Hand stitch using tiny backstitches. When completed, be sure to slash the margin the fingers and thumb (tiny red line). Now for the hard part...turn the glove right side out. Use a pin to carefully pull out the thumb.
Jewelry to go...
I'm not a jewelry designer. But that doesn't stop me from affording my dolls exquisite bracelets. Take stamped metal medallions, for example. Whether squares, rectangles or circles, they make fancy bracelets for my girls, simply by bending them around a pencil. You can leave them as is, or decorate them with tiny press on gems.
One evening while window shopping on Ebay, I saw necklaces that made me think of.....earrings. These elaborate "necklaces" worn by these three models are vintage earrings where I removed the findings, added an eye ring, then suspended from either chain or a metal hoop. Nothing could be easier!
Remember that post, "
Wired?" I used wide twist ties to make bracelets which I decorated with rhinestones. Well....I started covering them with bits of leather, faux reptile and even added a stone. This a quick and easy way to make a stack of cuff bracelets that are cutting edge! Just remember to use a strong glue. And just in case you don't have access to those types of twist ties, cut off a small square of aluminum from a disposable pie pan. On Carla, I started off with a bit of aluminum and lined it with self adhesive Mylar (from a bumper sticker). The result is a sleek "chrome" bracelet. You can also glue on leather and other materials!
The tiniest of charms is just perfect to make dolly her own charm bracelet!
Aren't mirrored sunglasses super cool!!! I took another piece of Mylar and transformed an ordinary pair of Barbie glasses into a cool new look for Pat.
The top photo shows the before and after pictures of my glasses.
1. I started out by peeling off the adhesive backing then laying it over the lens of the glasses. Use a sharp object to "feel" and press the Mylar into the seams of the glasses' lens.
2. You can either carefully peel it away from the lens and cut along the indications. Or take a very sharp blade and cut along the lines you've made along the lens' seams.
Mod Squad
I've been trying to make glasses for my girls for a very long time. I've looked all over YouTube, but frankly, I was not happy with cardboard templates decorated with sparkle glue. I did find something for American Girl dolls which I have modified into something we can use as a fashion accessory for Barbie. With the 1970's retro fashion all over the runways, I thought "Granny Specs" would be an appropriate way to accessorize my girls new look.
1. Cut off about 6 inches of 20 gauge wire. Slightly bend one end so that it can hook over the ear of the doll.
2. Bend the wire a little bit away from the front of the face on the side.
3. Mark the inner corner of the eye.
4. Then wrap the wire around a round nose pliers to make a look big enough to frame the eye and then over.
5. Mark the inner eye on the other side of the face.
6. Again, bend the wire around and over the second eye. Adjust so that the loops are fairly even in shape and size. Then bend the wire back to the other side of the head. Curve over the ear and cut away the excess. You can stop right there for the granny specs. Or, with the addition of a small wire bar, we now have spectator wire glasses.
Make a tiny circle to one side of the horizontal bar. Hook onto one of the eye loops on the glasses. Repeat for the other side. With the pliers, press each loop into the glasses.
Follow us on Twitter: @FashDollStylist
All images and text property of Fashion Doll Stylist. 2015.


I love all these little snippets of ideas especially that you are showing us how you did them. Thanks for sharing!
ReplyDeleteThank you Phyllis. Glad you enjoyed this post.
DeleteYou have the best ideas and tutorials! Thanks for your generosity!
ReplyDeleteThank you KMQ. Hope some of these ideas will be of some value to you.
DeleteOooh! Those are all so wonderful! <3
ReplyDeleteThank you Uraru. Only too happy to share my ideas with friends!!!
ReplyDeleteSo many awesome ideas, I hardly know where to start!
ReplyDeleteFiligree jewelry findings as bracelets... is genius. I did something similar with a broken earring, and here's how it turned out: http://www.saturdaysequins.com/2014/01/quick-and-easy-doll-collars.html The best part about filigree is that you can just snip off the parts you don't need!
The glasses are so much fun! One thing that would be fun is to dip them in Tool Magic, which is something wire workers use to coat their pliers to keep from marring the wire. It comes in different colors and is perfect for uncoated copper wire -- which I have tons of -- to keep it from reacting with dolly vinyl and turning it green. Already colored wire would be fun, too... but you know me; I like to make everything difficult. ;) I'm also thinking, if there were some way to make lenses out of sequins or confetti, you could make some Elton John glasses.
Thanks for all the inspiration! <3
Sarah, Thank YOU for all of those extra tips and links. I LOVE what you did with the earring. I was not even thinking about converting a shape like that into a necklace. Thanks for the tip about Tool Magic. I too thought about making some sort of lenses for my wire frames. I thought of cutting tiny circles or even finding crystals the size of each frame. The crystals would be glued to the exterior of the frame, however, sequins or cut circles of mylar would be glued around the interior of each frame. In any case, it's fun to bounce around ideas with you!
ReplyDeleteI really look forward to our creative brainstorming sessions. <3
DeleteHere's another idea that came to me Saturday: resin for the lenses. You can color it any color, and it will naturally stick to the wire if you lay the glasses on some contact paper (or anything else removable, like scotch tape) and pour the resin in. You can trim away any that overflows.
I've used Ice Resin -- I took a class with Susan Lenart Kazmer, a fantastic mixed media jewelry artist, several years ago. It's jewelry grade, and when you mix it right, it's as smooth as glass. I've mixed PearlEx pigment powders into it, and I've heard you can use acrylic paint, too. My friend Carmi has a blog about resin: http://resincrafts.blogspot.com/ Susan has a book called Resin Alchemy. Sherri Haab has a good resin book, too.
The only thing is... even with the "non toxic" resins, you really want to be in a well-ventilated area. That stuff smells terrible while it's curing, and it actually gives me a headache.
Thank you again for the tips and ideas. I did think of resin, but am familiar with the toxic nature of this material. I wasn't aware of the "non toxic" variety. But if it smells, it's probably something that needs to be used outside. You be careful when working with it!!! I'll be sure to take a look at your friend's blog.
ReplyDelete