The Fashion world is in a drought. There are no catwalk shows, no red carpet events, no parties, no exhibitions, no concerts.... Without all of these sources of inspirations, now is the time to go back to basics. And to spruce those basics up, we look to things like textiles, fabric manipulation... or for the sake of this project....embellishments. This is great because, with a few little scraps you can transform a plain piece of material into a luxury fabric or create trims that add a generous dose of glam to almost every garment. For this project I looked at DIY fabric flowers and adapted them to serve as embellishments for our 1/6 scale fashions.
Let's start with a super simple rose. You can make them from any fabric you want in any size you want. Depending on the fabric, you will get different effects. For the two garments pictured here, I wanted to use my roses as a trim to replace feathers or even fur.
1. I had begun working on a light blue suit jacket made from a piece of old light blue denim. I used the same denim to create my roses. I cut circles approximately 1-1/2" (4 cm) in diameter. You don't have to be so careful when you cut. In fact, your roses will be a little more interesting if the circles aren't so perfect! Cut about 4 circles. Then fray the edges.
2. Fold each circle in half, then in half once more. Stitch the bottom point to hold in place.
3. Take the second circle and repeat the process. Add it next to the first circle. Continue until all four are together..
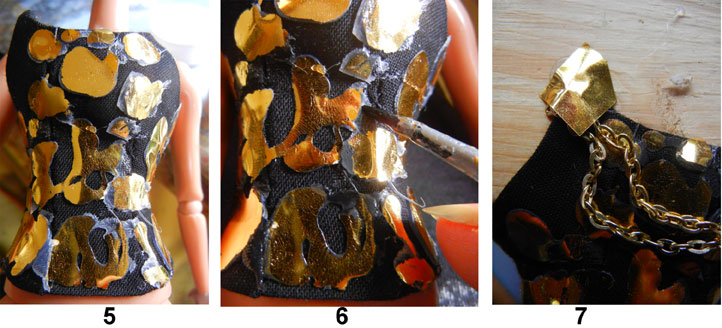
4. Turn to the underside and fan out each cluster. It should look like this on the underside.
5. On the right side, here's what your flower looks like. The two-tone fibers of the denim really make for very pretty roses. Don't worry about the fraying. It adds to the beauty.
Of course, this was going to be just a corsage, but then I couldn't stop.... I made four more big roses to trim the hem of Stefani's jacket sleeves and two smaller ones for the pouf buttons!
What's fun is that you can use almost any fabric for this. That means you can compliment the fabric you choose with a perfectly matched trim!
Case in point, I took a piece of the herringbone and made four more fabric flowers to put around the neck as a collar.
Instead of fur or feathers, think of using giant fabric roses! For Helena's collar, I cut four, 1-1/2 inch (4mm) circles tacked around a basic coat pattern. It would have also been fun to create a trim around the hemline! But where you can really have some fun is with evening wear.

Let's begin with a simple rose. For this you will need scissors, small bits of synthetic fabric cut into circles, a candle and matches, needle, thread and a few tiny beads.
1. The fabric you choose MUST be 100% synthetic or this will not work. Synthetic fabrics melt when they come in contact with a flame. Natural fibers (which includes rayon, will burn!) Before you began cutting your circles, test a scrap of the fabric first! Now, cut your circles. I generally prefer 4 per rose. The more you use the denser the flower.
2. Light a candle.Then with each circle, bring it close to the bottom of the flame about 1/8" (or 2mm) away from the edge. Carefully approach the flame only close enough for the fabric to curl. Then rotate so the entire edge has curled and melted slightly.
3. The circles can be different sizes Experiment with different types of fabric. I used polyester organdy, polyester taffeta, tulle....
4. When you have finished making enough circles for all the flowers you need, stack the layers. Here, I have stacked four layers.
5. Pin together on the bottom to hold in place while you sew them together.
6-7. Knot your thread and push the needle up from the bottom. Make a few stitches. Knot the thread after your last stitch.
8. Right side up, the rose looks like this.
9. Here, I've added a few tiny seed beads to the center of my flower.
Shakira's drsess is in two parts. The skirt is made from stretch lace to which I added my taffeta roses in the front and to one side. The dress is draped up and over the skirt to expose the roses. I also added tulle roses to the top of the neckline.
Sometimes a single rose will do. I took a simple gown with a deep slit over the leg and added a rose as an accent.
Or, the roses can be more a more prominent focal point as Aayeesha shows us. An otherwise boring black sequinned sheath gets a dramatic new look when black taffeta roses (and a tad bit of feathers) are added around her strapless neckline!
But you don't have to use the roses intact. You can simply use the petals to create a showstopping gown.
Using polyester organza, I cut my circles and melt the edges. Instead of stacking them together, I tack them onto a strapless bustier (of the same fabric) instead and stagger them from front to back.
Here, Noor shows off the finished dress. The top is worn over a circle skirt of the same fabric. And for this photo, I wrapped her waist and tied it into a bow with a matching organza ribbon.
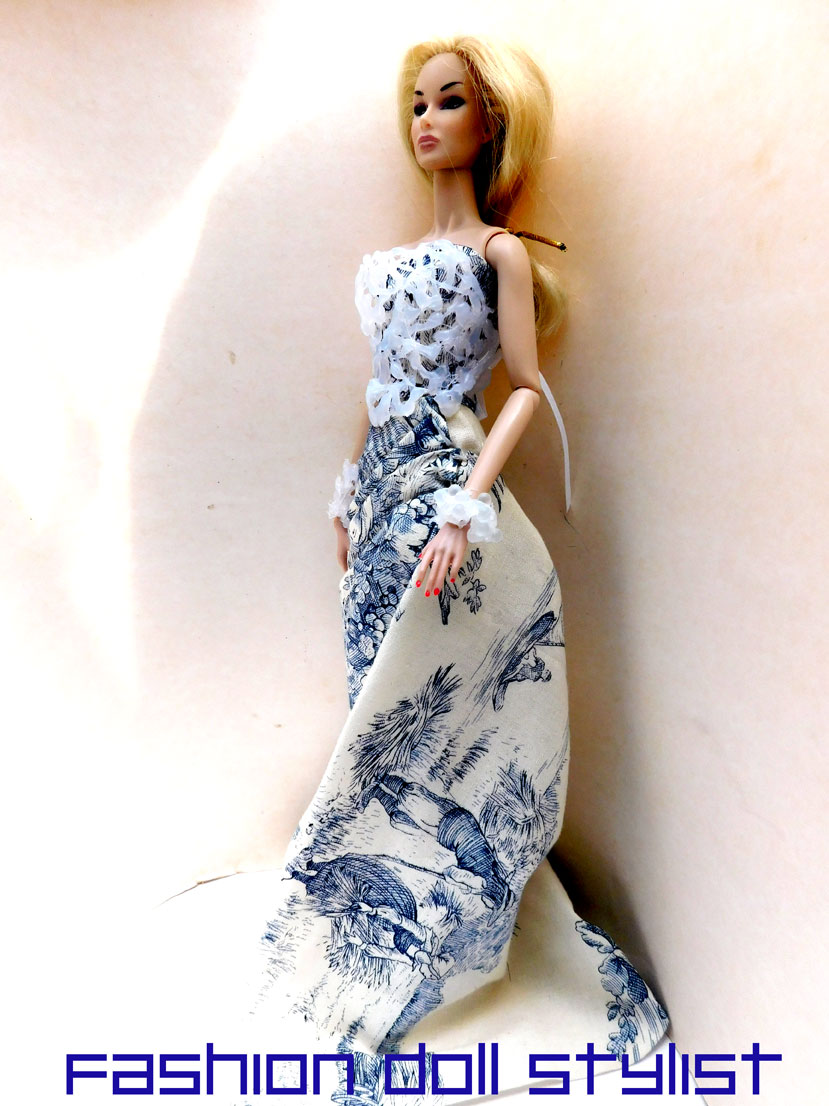
Two years ago while searching for fabrics for the wedding dress post I did, I discovered "couture fabrics." These are fabrics with silk flowers, beads, petals and leaves worked into the design. They are essentially made for wedding gowns so you know they cost a small fortune. I could not afford to buy any of them, but I did study them in an effort to create my own. In this first photo of Isabela (a Tonner doll), I made a bustier from a scrap of embroidered tulle tacked onto a tulle camisole. The skirt is simply a sarong using a beautiful piece of grey-tone floral printed chiffon. I wanted to create bring a few flowers "alive" with 3-D applications, but in a subtle way. For this skirt, I made pinwheel roses out of the same fabric.
For the first 6 steps I'm using a solid white fabric so you can see the details better.
1. Begin by cutting squares. Again, I've cut them 1-1/2" (4cm).
2. Take each square, hold diagonally and gather it in the middle and twist.
3. With needle and thread, stitch through the center.
4. Wrap the thread around a couple times and push needle through.
5. While the first square is still on the needle, take the second square, gather in the middle, twist and add it to the first. Do this for the second and third square.
6. After you have added the last square, wrap the thread around all four, push the needle through and knot.
7. If your fabric is thin (like the printed chiffon I've used for the sarong), bend the two halves of the squares together and add a few stitches around the base. Turn right side up and spread the petals evenly.
8. Here you can see how my 3-D motif brings "alive" the flower print.
9. I didn't want my flowers to overwhelm the print so I added them to a few strategic places. Since this fabric is being used as a sarong, I put it on the doll first, then determined where the silk flowers should go.
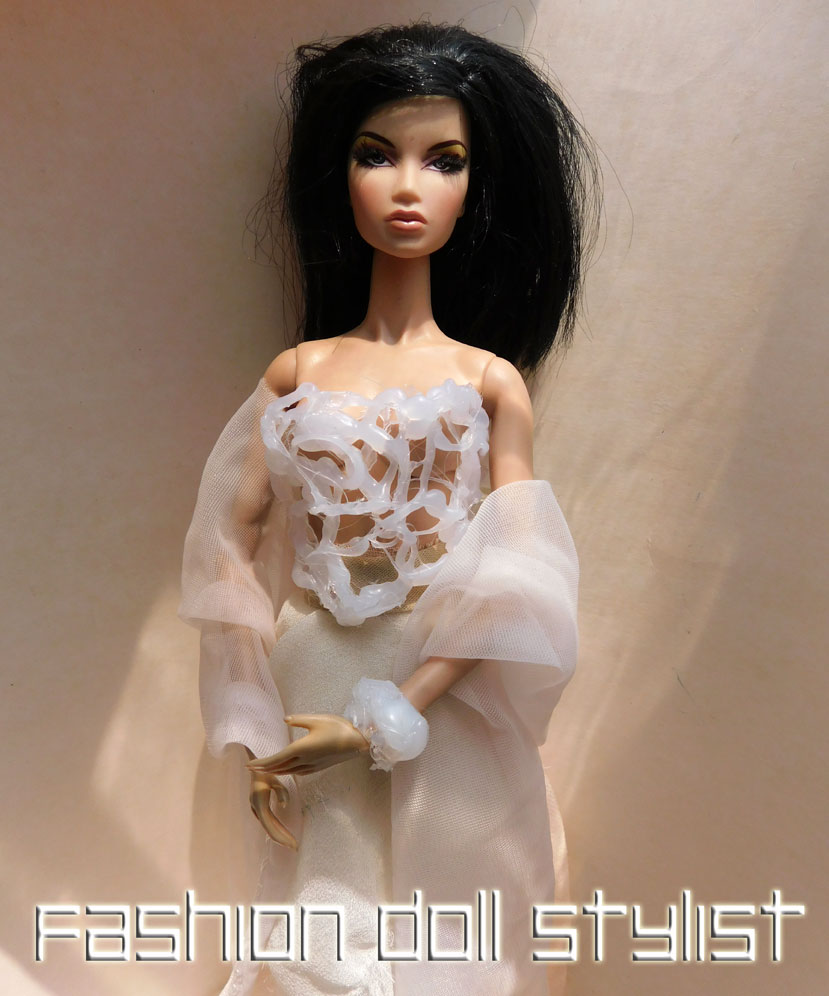
Of course, there are times when you really do want to pull out all the stops and create a beautiful piece of fabric. Here is where the wedding couture fabric greatly inspired me. Estelle was already wearing a white satin slip dress. So as soon as I finished this piece of lace, she grabbed it and tossed it over her shoulders.
Before we start, let's make our "rosebud."
1. Start with a square. The size will depend on your needs. Here, I am working with a 1" (2.5cm) square.
2. Fold in half, then fold in half again. The folded edge pointed downwards.
3. Cut a heart shape at the top.
4. Fold this once more in half and stitch down the folded bottom corner.
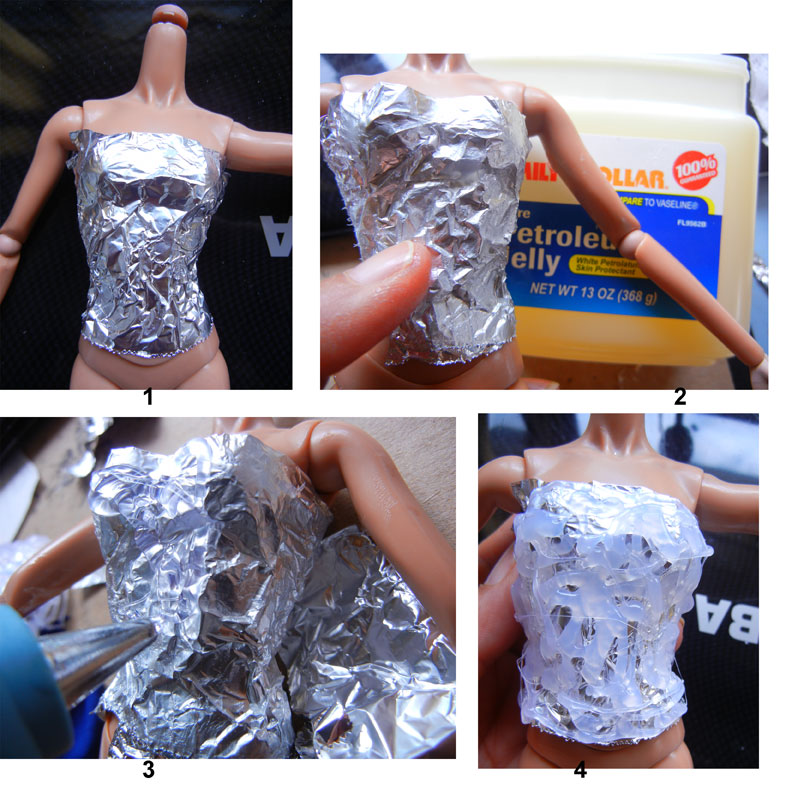
For this project, I made fabric roses out of polyester taffeta and pearls but added a few "rosebuds." as well. Here I took a very inexpensive piece, horribly ordinary piece of 6" (15cm) lace trim and turned it into a luxury item thanks to roses and bits of lace decals cut from an old blouse.
1. The lace on lace look recalls "re-embroidered lace." I thought it gave the fabric a little something extra.
2. I made my rose, dotting it in the center with a pearl. This is placed in the middle of the woven pattern of the flower.
3. I add a "rosebud to the flower pattern near the edge of the lace (just under the scallops).
4. Before and after. Here is my finished fabric.
Estelle has turned this into a shawl, but you can also think about using it for a dress or an evening skirt.
Like us on Facebook: @FashDollStylist
We're also on Pinterest: @FashDollStylist
And of course, follow us on Instagram: @fashiondollstylist
All photos and text property of Fashion Doll Stylist. 2020. Please do not reproduce without prior permission and please always credit us.