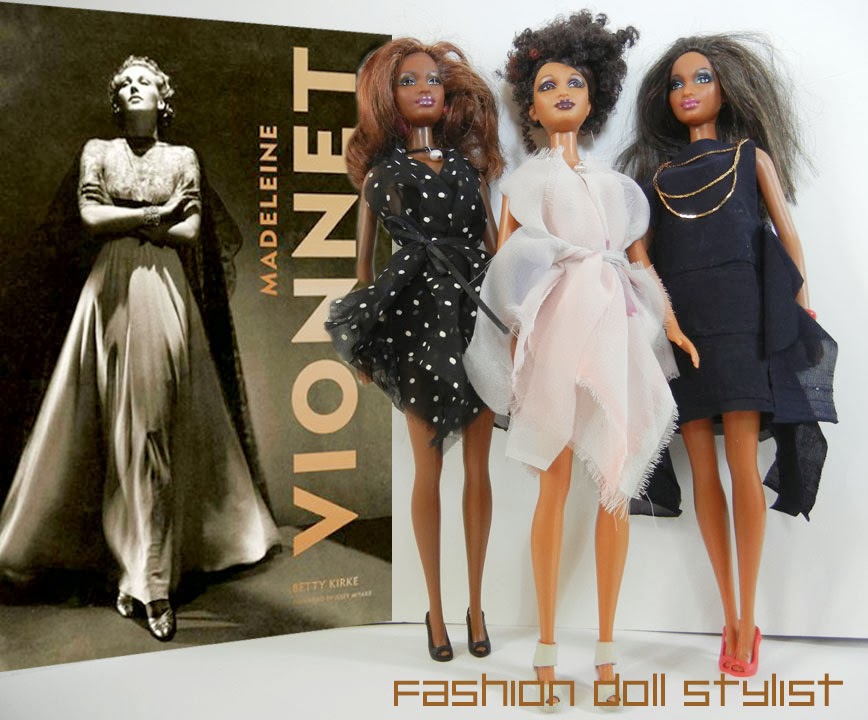
Professional fashion designers draw from many different sources of inspiration. This can originate from travels, pop culture, and quite naturally....historical references. In preparing my summary of New York fashion week, I could not help but notice the return of "handkerchief" hemlines in a few collections. In one of my last posts, I made mention of Madame Vionnet, the haute couture icon best known for her bias (diagonally) cut dresses. But she is also know for garments made from patterns that resemble puzzles.
 |
| Dolly's version of Vionnet's Jabot dress (left). |
Knowing that some of you are feeling a bit challenged by traditional methods of pattern making, I've decided that from time to time, I we should do some super simple projects. This time around, I've taken two of Mme. Vionnet's most famous garments, the "Jabot" and the "Chiton" dress and interpreted into clothes for our dolls. Keep in mind...when drawing inspiration from the past, it is very important to update the aesthetics so that the final product reflects current times. Otherwise, the dress is a....costume!
These two dresses are created with multiples of squares or rectangles. The fabric you use and the size of the squares chosen, will determine the outcome. The hardest part for me, was figuring out the puzzle. However, I've tried very hard to explain the steps as clearly as possible.
The Jabot Dress


Pin together, each of the pack's top two points (this will fall on the shoulders).

Now, put this on the doll and adjust the pins to fit the doll (12). For this version, pin each side (under the arms) (13). Then pin the diagonal seam that falls at the back (14). The front will simply open out (15) with a single pin at the throat (which I will later hand stitch closed). You will then stitch down the seams marked with the pins. Press out the seams and turn right side out. For this version, I have used a silk chiffon with frayed raw edges. Then I cut another strip of fabric to use as a self-belt.

This resulted in the following dress.

A slight variation of this is to stitch the dress close to the body so that the triangles fall vertically. Together with the use of a synthetic fabric, this will produce a dress with plenty of bounce.

Follow all steps through #12. The difference will be that this time, you will put a row of pins so that it traces the form of the doll underneath. The sides will flap out.

In real fabric, the dress will look like this without the belt.

Fold out each square. Then add a belt. I've used a 1/8 inch ribbon.

Again, feel free to play with the proportions. This would make a cute top in an embroidered cotton or a dramatic kaftan in a colorful silk. And if you are really ambitious, you can make this dress for yourself out of scarves!!!
The Chiton Dress
 |
| Dolly's version of Vionnet's "Chiton" dress (right) |
This garment is simpler though more time consuming. The original (sketch on the right next to the doll) was made with a woven silk. Because I wanted a more modern look, I chose a silk jersey for my dress. If I had more time, I probably would have turned down the edges of each horizontal strip. This is a "design" decision you can make as well as the width and the length of the strips.
I figured out the dimension with tissue paper first measuring the doll from side seam to side seam. This will not be a skin tight dress so that the doll can get in and out of it without the need of any closure. The front and back are identical. The horizontal strips are 3 times the width of the front and back panels.


Stitch the horizontal strips to the vertical strip. Line up the front to the back so that you can align the placement of the horizontals at the back. Next, lay each set of strips, right side facing out. Stitch the sides together. Slide onto the doll. At the last minute I decided to add straps to this dress. I made a small tube cut in half. I attached each strap to the dress while the doll is in it. Adjust and hand stitch in place.

You can make this your own by shortening this into a top with thinner horizontal strips. Or lengthening it into an evening gown. Consider contrasting strips.
Follow us on Twitter: @FashDollStylist
All photos and images property of Fashion Doll Stylist. 2014. Please do not reproduce without prior permission. Thank you.

Hi FDS, as usual a very interesting post, I love how you interpreted these dresses, a great source of inspiration!
ReplyDeleteThe Chiton dress really impressed me, I'm going to check Madame Vionnet Designs!