Many of our readers are novices with little or no experience in sewing. Some have figured things out on their own while others still struggle to stitch a straight line. In an effort to help any of you who are a tad bit challenged in this area, I am introducing a series of tutorials under the banner, "Sew What." These posts feature "the basic necessities" to help ensure your projects will have the best possible outcome.
CHOOSINGFABRIC FOR THE FIRST TIME? KEEP IT SIMPLE!
Light to medium weight cottons or cotton blends, simple, lightweight wools, linen....are all good choices because they are easy to sew and don't cost an arm or leg. You can also save money by re-purposing old clothing, seeking out Avoid fabrics with nap or pile (like velvet or velveteen), plaids, heavyweight wools or slippery satins or silks. Once you have a little sewing under your belt, then you will be able to experiment with more complicated materials. Don't be intimidated by your mistakes. Chalk it up to a learning experience and continue to move forward. But first and foremost....don't forget to just have fun!!!!!
FIRST, IRON YOUR FABRIC
Before you start, iron the wrinkles out of your fabric so that you will be working on a flat surface. Doll clothes are so tiny, you need to be as exact as possible. Every millimeter counts!
RESPECT THE STRAIGHT OF GRAIN
Even though it's hard to see...and even though there's not much to a 12" doll....cutting out a pattern on the straight of the fabric's grain will ensure that your garment will hang the way it's supposed to. But how do you identify the straight of grain and once you do, then what?

When you buy a length of fabric from the store, one of the first things you notice is that the side edges are more dense than the rest of the remnant. It is what is known as the "selvage edge" or "selvedge." It has stronger threads than the rest of the fabric. Threads running parallel to this edge are usually straight with a cross grain running perpendicular (or 90 degree angle from the selvage). The direction running 45 degrees is known as the bias which has the property of being naturally stretchy and hangs into softer drapes over the body particularly in eveningwear. But for our purposes here, you want to line up the straight of grain marked on the pattern pieces with the selvage edge. Place a pin at the top of your straight grain line. Measure to see the width between that line and the edge. Then make sure the bottom of the straight grain line is the exact same distance.

For pattern pieces that fall further away from the selvage edge, you can line them up with other patterns' straight of grain line.
Since many of us make doll clothes from scraps of fabric or vintage clothes, how do you identify the straight grain! 1) Take the scrap in both hands and stretch. 2) Pull on both sides. In both cases the fabric should remain taunt. 3) It only stretches on the bias. 4) Once you have established the straight grain, draw a light line, then line up the straight grain of your patterns with that of the fabric.
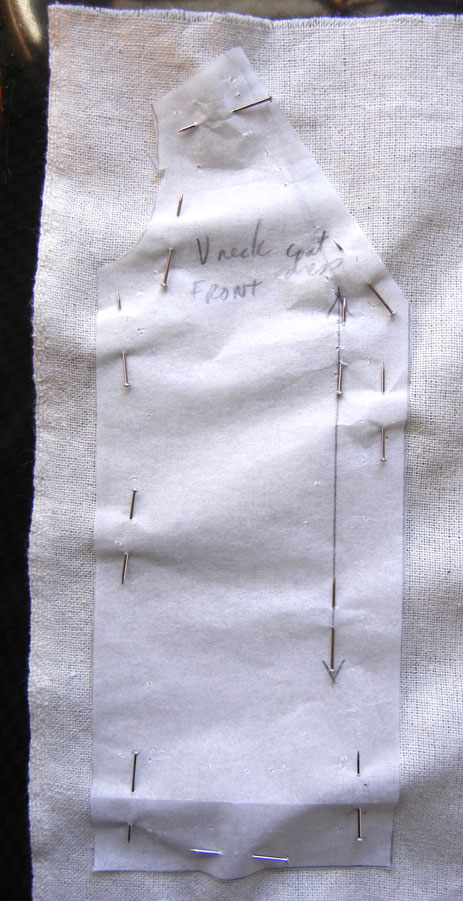
PIN YOUR PATTERN TO THE FABRIC
Pen your pattern to the fabric, then cut along the outer seam lines. Transfer details like darts and such to the fabric using dressmaker's carbon and a tracing wheel.
Note: When working in leather or similar non-wovens, it is better to tape the pattern down then trace it using tailor's chalk or pastel pencil and transfer all construction detailing (like darts).
PLAIDS
Feeling confident enough to work in plaids? Line up the bottom edge of all pattern pieces along one of the stripes to make sure they will match at the sides and flow uniformly around the body.
Note: before you lay out your pattern, be sure the side seams of the front and back patterns are the same length!
BORDER PRINTS
You can have a border print on a garment simply by lining up your pattern pieces side by side along the edge of the fabric (or scarf, for example). Just be aware that to pull this off, the pattern pieces can't have too much flare. That is to say, we won't be able to do a circle skirt or a four-gore skirt using this method.
On the other hand, it's perfect for gathered skirts, trouser legs and sheath dresses!
SINGLE DIRECTION PRINTS
When you are working with single direction prints, all pattern pieces must be placed with the top edge up.
TWO-WAY PRINTS
However for most flat, plain fabrics, small prints and those where the motif move in various directions, your pattern pieces can be right side up or upside down. What you cannot do is to turn some of them on the side!!!
DIAGONAL STRIPES
You can create a dramatic look by laying your pattern pieces at a 45 degree angle from the straight of the grain. Here, To make the skirt with the diagonal stripes pointed upwards, note how I've laid out my four-gore skirt. I've indicated the CF (Center Front) and each side will line up at a 90 degree angle from the other side. This works for bodices, side panels, collars. On your pattern piece, you will make your "straight of grain" markings at a 45 degree angle moving upwards or downwards, depending on the look you want.
FABRICS WITH NAP OR PILE: VELVET, for example
Should you ever be tempted to work with velvet, velveteen, corduroy or any other fabrics with pile, you will need to lay out your pattern pieces in a single direction. On the left, the SAME fabric has a totally different look when place in an opposite direction.
One more tip: Certain patterns tend to look like pieces of jigsaw puzzles. After you've cut out your patterns from the fabric, leave the paper pattern on until you are ready to pin them together. This is very important when there are lots of little elements to a pattern (like a jeans skirt, for example). Indicate the top, bottom and even the side of each piece so that you won't be confused when assembling everything together!
All images and text property of Fashion Doll Stylist. 2015


I know this page is a few yrs old, but I just seen it. I was curious about that mini iron you are using, I had seen it in another one of your blog posts, but cannot find it. I would like to purchase a mini iron, but does this one have a steam setting? I know steam pressing is good for some garments. I have trouble using my regular sized iron for small doll clothing. I love your blogs btw, you have very spoiled dolls lol. :)
ReplyDeleteHi and welcome to my blog. And yes, my dolls are spoiled beyond reason!!!! :D I use the Dritz Petit Press Mini Iron. I bought it at Michaels in the US and I have seen in sold in European stores but you can also find it on Amazon. It's typically used by quilters which makes it perfect for ironing the tiny seams of doll clothes. What is nice about it is that it will turn itself off automatically after awhile. Unfortunately it is not a steam iron, so I use a "pressing cloth" made from a small square of white or natural colored cotton fabric moistened with water. A list of other items--including the sock covered pencils I made for ironing sleeves and pant legs--can be found on the post "Material Girl" (02/12/13).
DeleteGreat! Thanks so much!
DeleteOk I bought the Petite Press iron aswell as a sleeve iron board! This shall be so much fun! :) Thank you again.
Delete